
time:2021-09-07 author:admin
Today, I brought you how to add nitrogen to the crushing hammer. Many people only learn to play the crushing hammer, but have not seen the master add nitrogen. So today, I selflessly dedicate the illustrated tutorial to those friends in need, hoping to bring you some experience.
Without much nonsense, go straight to the subject.
At this prompt, all bosses and machine friends should ask how much nitrogen is suitable for the hammer when the machine is equipped with a crushing hammer. The amount of nitrogen may be different for different brands. Generally, the crushing hammer is added with 13-16 middle ones. Here's a friendly reminder. If the nitrogen is added too high, the hammer will be hairpin as long as the hydraulic oil temperature comes up, If the nitrogen is too low, the crushing hammer will be weak.
Nitrogen cylinders, tools
Nitrogen cylinder, nitrogen meter, 17-19-24-27 wrench and screwdriver. This is a required tool. The tools vary with the crushing hammer. It is best to take a picture with your mobile phone before taking out the nitrogen meter in the box, because it is always placed incorrectly when it is installed.
Crushing hammer nitrogen filling port
The place where the red circle is drawn in the figure is the place where nitrogen is added. First, use a screwdriver to clean the mud around, and then blow gently with your mouth to blow away the dust to prevent the screw from opening and dirty things from entering. This is the upper and lower screws, some are the lower screws, and the upper is installed with a grease nozzle.
Remove the filler
The wrenches of 27 and 17 come into play. Turn gently when turning. Press the lower screw and turn the upper one. Don't make a mistake when removing the screw. If you're not sure, gently remove it tentatively. Under this friendly prompt, "don't lose the O-ring in the upper small screw". The renderings are as follows ↓
Hammer body
This is how the screw on the top is removed. The next step is to use the nitrogen meter to measure the amount of nitrogen in it.
Residual nitrogen measured by pressure gauge
After installing the nitrogen meter, start measuring the nitrogen, but before measuring the nitrogen, make sure that the screw of ring 2 is installed. If it is not installed, all the nitrogen will be released when you measure the nitrogen. Measuring the nitrogen is to press down ring 1 to see how much gas is still in the gun head. In the above picture, we can see that there is not much nitrogen in it. No wonder the hammer has no force, After the measurement, lift the needle at circle 1 to prepare for the next step.
Prepare to add nitrogen
In the figure above, we can see that the needle at circle 1 is lifted up, and the nitrogen in the nitrogen meter returns to 0. At this time, we open the screw at circle 2. Note that there is an O-ring inside. Don't lose it. If you lose it, adding nitrogen will leak. Next, connect the nitrogen meter with the nitrogen cylinder with the gas transmission pipe. The renderings are as follows ↓
Add nitrogen
At this time, the line is connected and all steps are ready. The last step is to inflate the gun head. Pay attention to the place with the circle in the picture. The needle must be lifted before inflation. Then turn on the blue plum blossom switch of the nitrogen cylinder and turn it off for a while, then turn it on and then turn it off, so as to cycle, Do not open it for too long, otherwise nitrogen will be added too much. During the process of adding, you should always see how much the gauge needle has added, otherwise it will be deflated.
Adding nitrogen is so simple. I don't know if you understand it.
2021
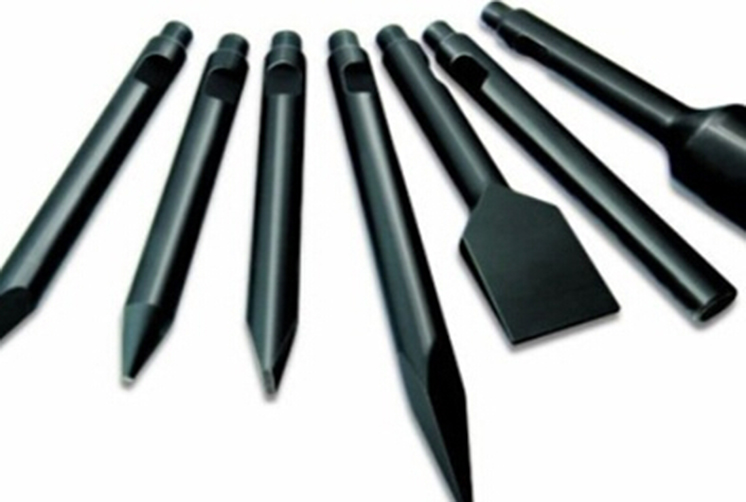
Good operation and maintenance habits can avoid excessive consumption of drill rods. Here are some examples in this regard.
2021
Relying on the hydraulic power device, the hydraulic crushing hammer plays the role of impact, hammering and gravel. Due to a series of advantages of wide application range and high work efficiency, the hydraulic crushing hammer is widely used in mining, metallurgy, transportation, railway, tunnel and other industries.
2021
As the saying goes, if you don't do it in 1929, walk on the ice in 3949 and look at the willows along the river in 5969. Now is the coldest time of the year. For friends who use the broken hammer, maybe some have left the love hammer idle, or some are still struggling in the cold days. Now let's share how to make the crushing hammer survive the winter safely:

Good operation and maintenance habits can avoid excessive consumption of drill rods. Here are some examples in this regard.
Relying on the hydraulic power device, the hydraulic crushing hammer plays the role of impact, hammering and gravel. Due to a series of advantages of wide application range and high work efficiency, the hydraulic crushing hammer is widely used in mining, metallurgy, transportation, railway, tunnel and other industries.
As the saying goes, if you don't do it in 1929, walk on the ice in 3949 and look at the willows along the river in 5969. Now is the coldest time of the year. For friends who use the broken hammer, maybe some have left the love hammer idle, or some are still struggling in the cold days. Now let's share how to make the crushing hammer survive the winter safely:

corporate name: Shandong Ligu mechanical equipment Co., Ltd

contact number:0535-6250553 / 15165525067

Online customer service QQ: 2976510847

Company address:200 meters east of the intersection HongKong Road and Shanjian Road, Linyi Economic Development Zone, Shandong Providence


Telephone consultation
15165525067

Back to top

